注意第1、2步骤也可不做!!!
1. 切换至”Project”项目视图,将app/src目录下的androidTest和test文件夹删除;
2. 将build.gradle(Module:app)中的depencies中的相关test选项注释掉;
dependencies {
    compile fileTree(dir: 'libs', include: ['*.jar'])
    compile 'com.android.support:appcompat-v7:24.0.0'
    compile 'com.android.support.constraint:constraint-layout:1.0.0-alpha1'
//    testCompile 'junit:junit:4.12'
//    androidTestCompile 'com.android.support.test.espresso:espresso-core:2.2.2'
//    androidTestCompile 'com.android.support.test:runner:0.5'
//    androidTestCompile 'com.android.support:support-annotations:24.0.0'
}
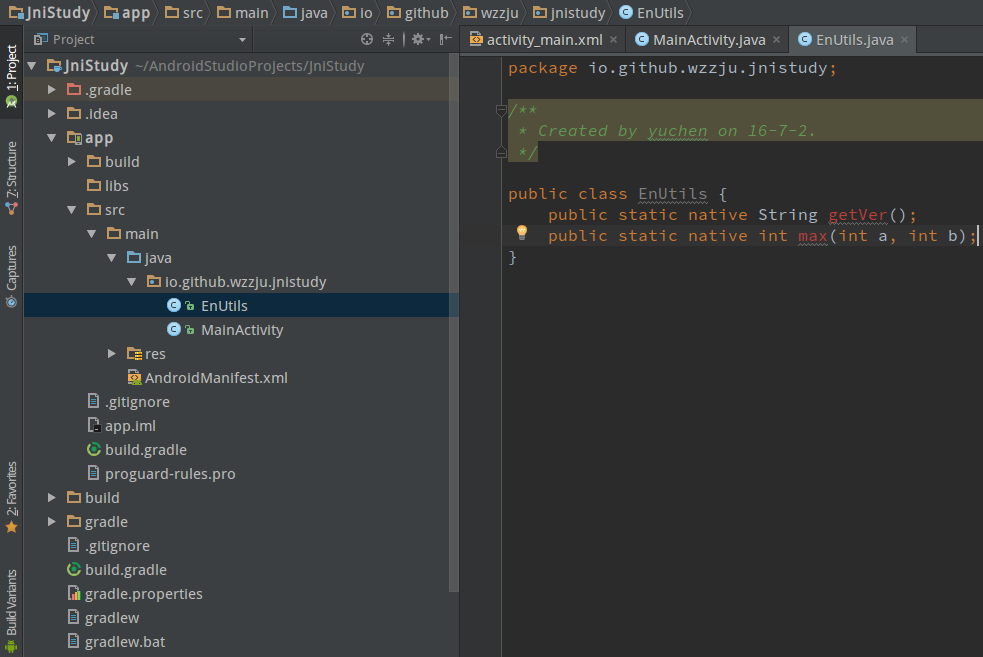
3. 新建一个java类EnUtils, 增加两个native方法。如图:
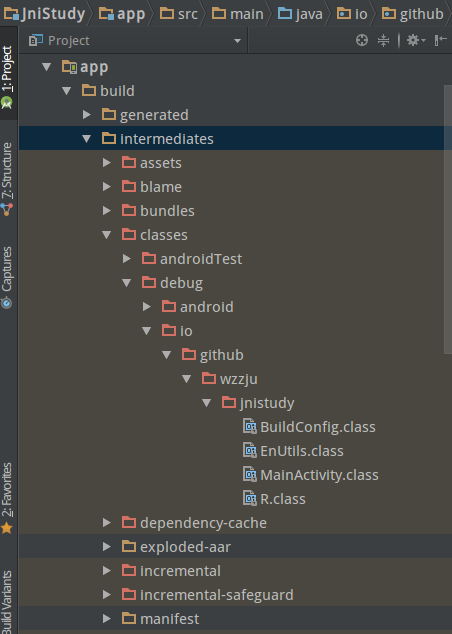
4. 点击Build->Rebuild Project。之后,在build/intermediates/classes/debug目录下就会生成 EnUtils.class文件。,结果如下显示:
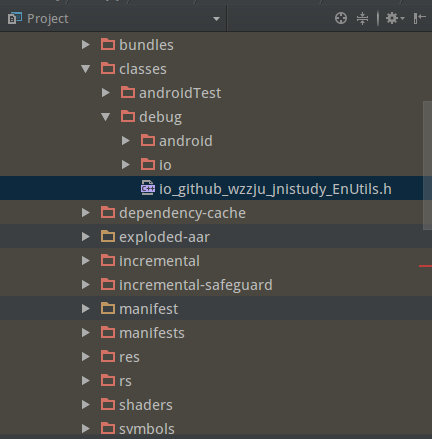
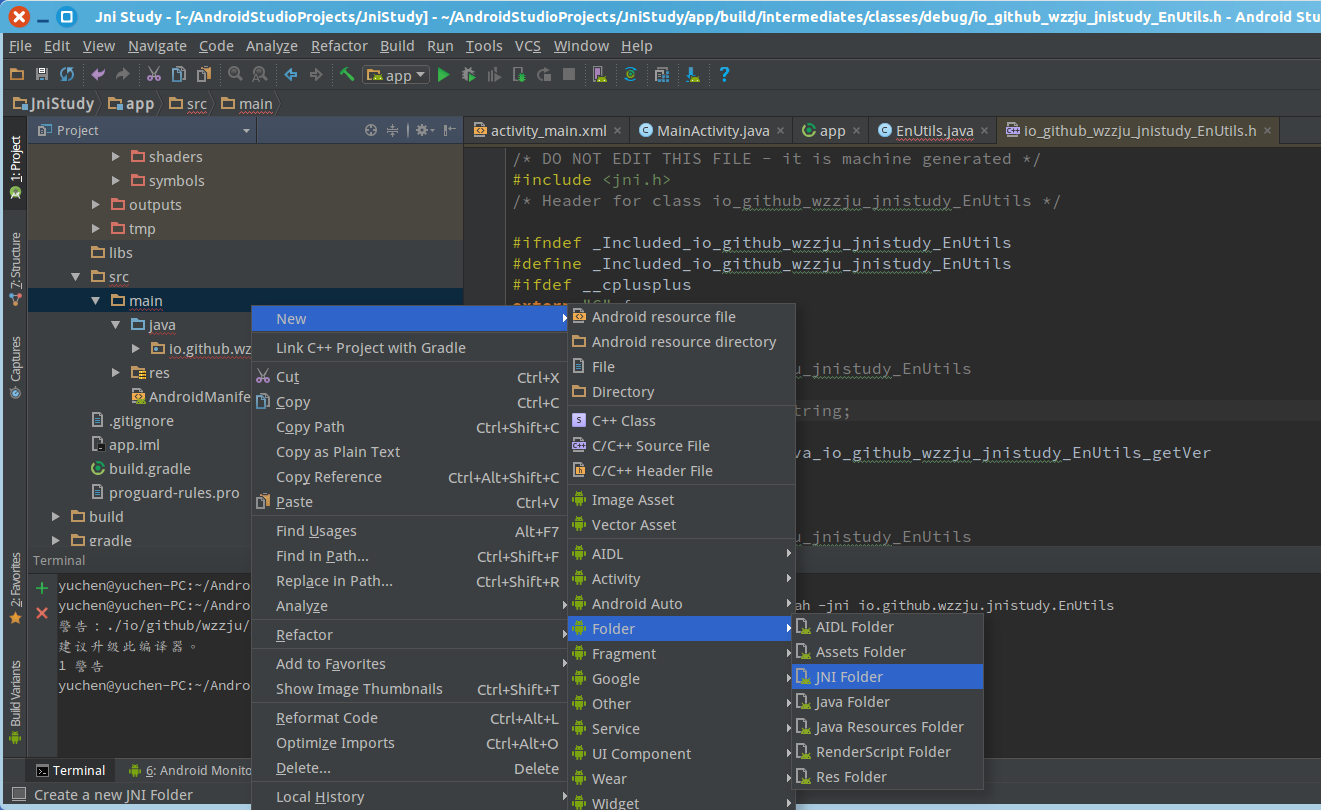
5. 进入到debug目录下(cd app/build/intermediates/classes/debug/),执行javah命令,即javah -jni io.github.wzzju.jnistudy.EnUtils,就会在app/build/intermediates/classes/debug/目录下生成一个io_github_wzzju_jnistudy_EnUtils.h头文件。
6.在src/main目录下,创建jni目录,把之前生成的头文件复制到jni目录下。
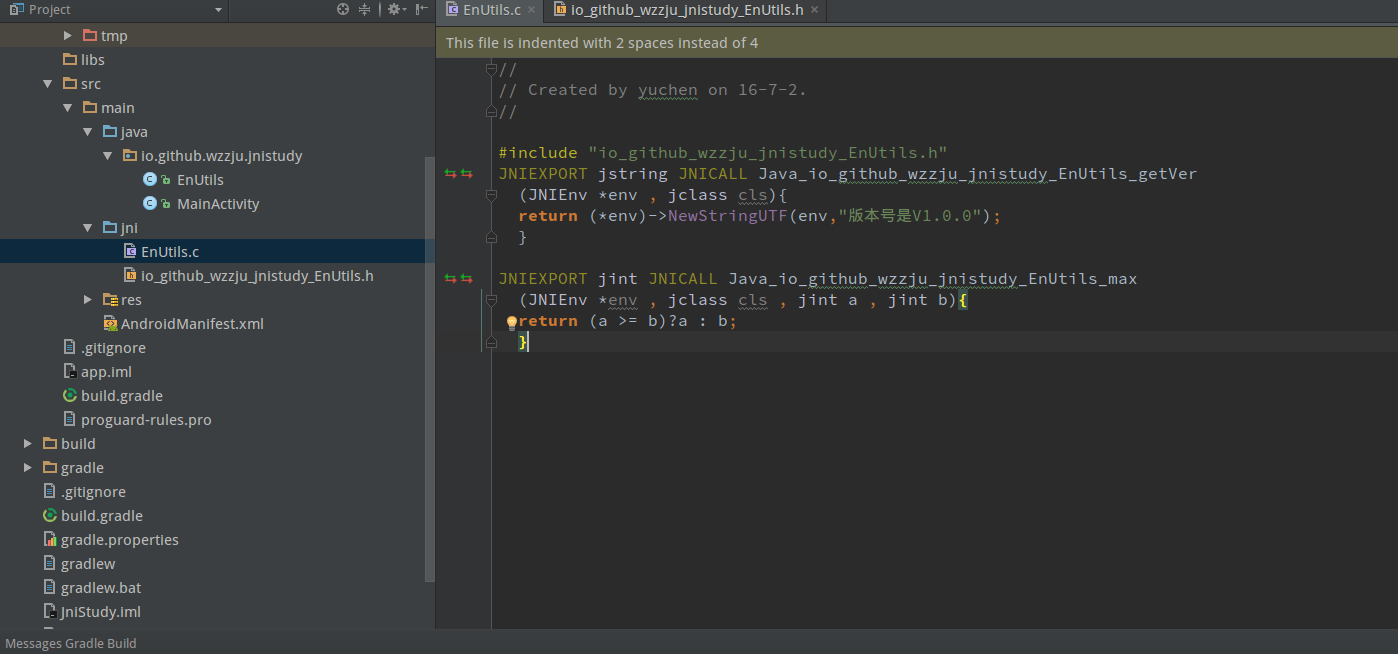
7. 在jni目录下,创建c源文件,文件名可随意。函数实现,如图:
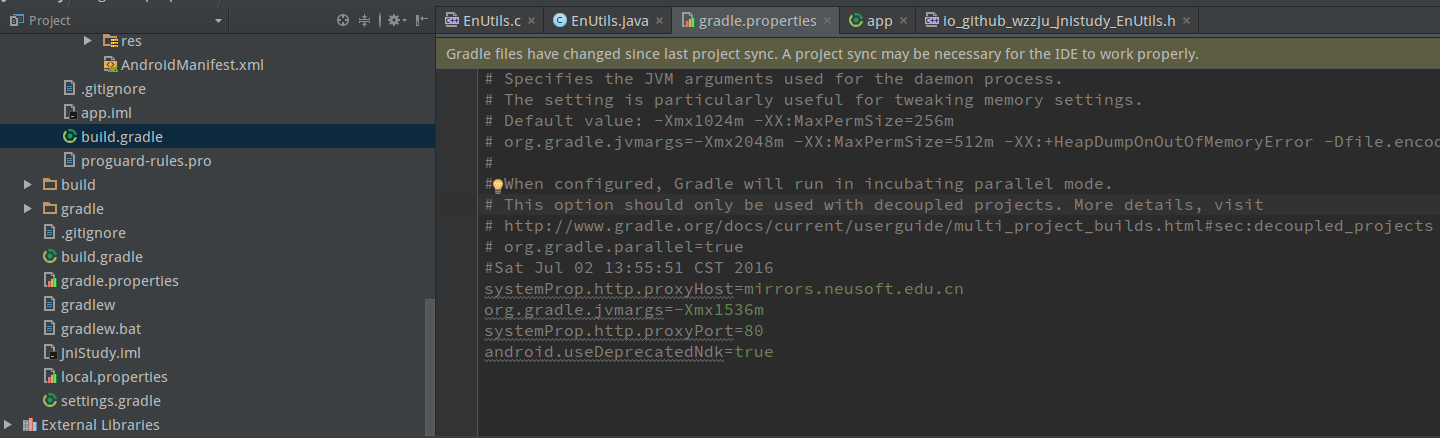
这一步之后就可以Rebuild Project了,但会出错,依据提示修改gradle即可。
8.配置gradle
- 在gradle.properties中增加一行android.useDeprecatedNdk=true
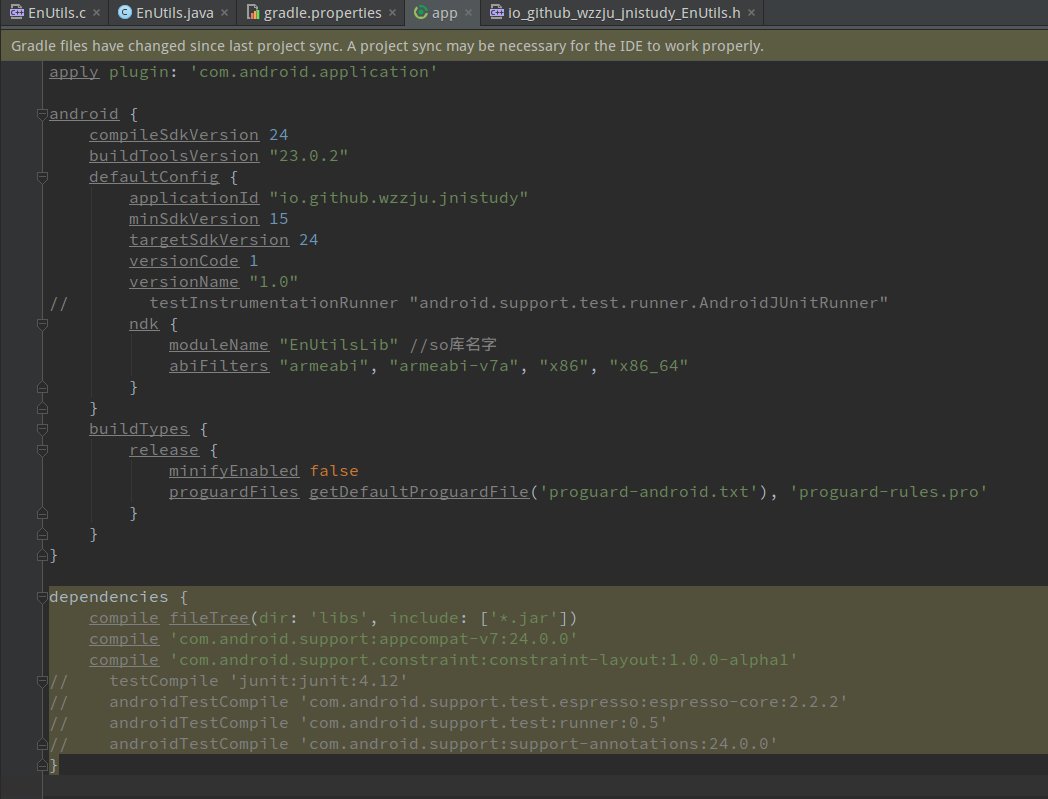
- 在app的build.gradle的defaultConfig中增加
ndk {
         moduleName "EnUtilsName" //so名字
         abiFilters "armeabi", "armeabi-v7a", "x86", "x86_64"
    }
并注释掉testInstrumentationRunner "android.support.test.runner.AndroidJUnitRunner"此句,也可以不注释掉。
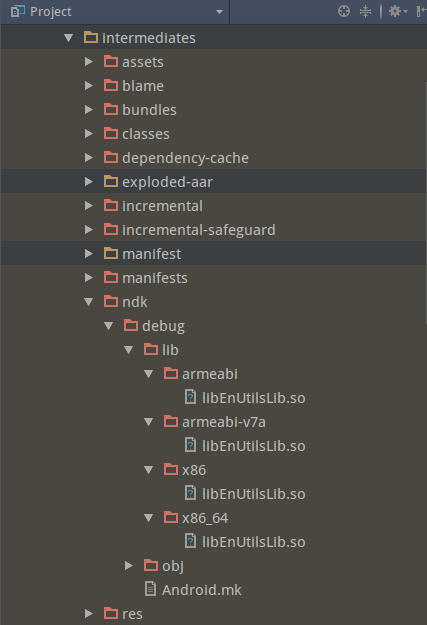
9. 再次Rebuild Project,就生成了so文件,如图:
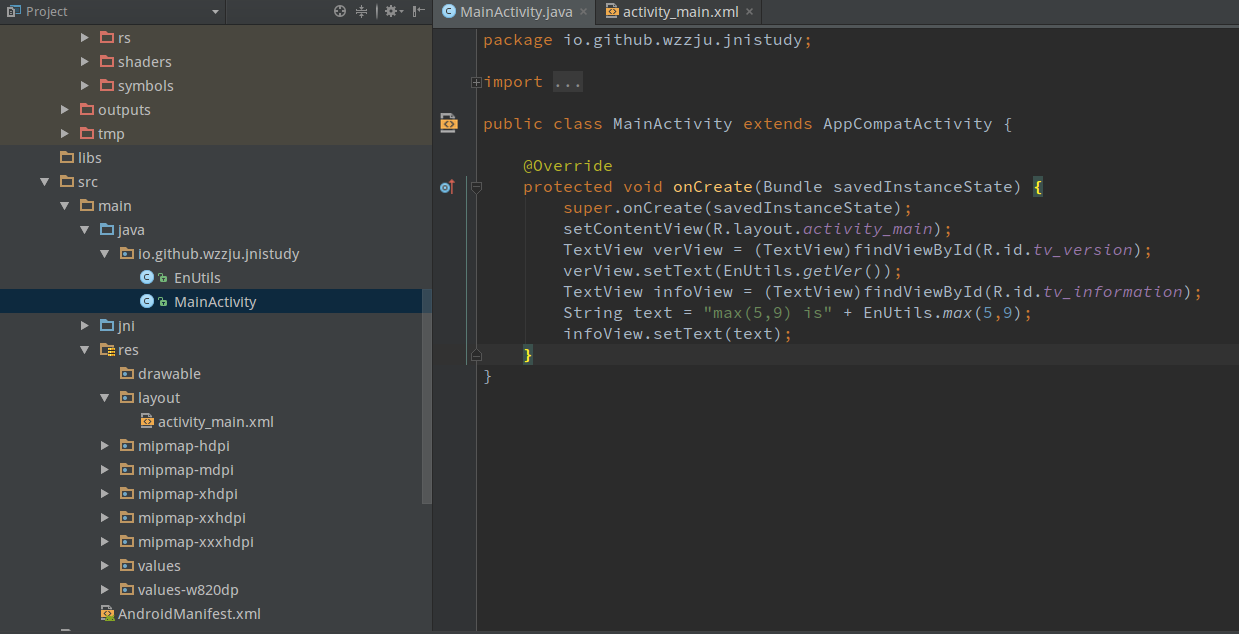
10. 如何使用调用so库文件? 即,在EnUtils类中添加加载so库的代码,名称要和build.gradle中定义的ndk moduleName一致。
package io.github.wzzju.jnistudy;

/**
 * Created by yuchen on 16-7-2.
 */

public class EnUtils {

    static {
        System.loadLibrary("EnUtilsLib");
    }

    public static native String getVer();

    public static native int max(int a, int b);

}
Java中调用,如下图:
11. 运行,lldb始终配置不对,点击Run时会跳出如下对话框:

点击”Continue Anyaway”。
12.下面将要介绍,编译生成的so文件如何单独使用。
- 删除jni目录,以及目录下的.h .c文件
- build.gradle中ndk配置也删除掉。
- 在src/main目录下创建jniLibs目录,再将app/build/intermediates/ndk/debug/lib下的4个so目录复制到jniLibs目录下。
- 最后,重新Clean Project, Rebuild Project即可。